How to Set Up Macros in Razer Synapse 4
Create, import, and assign Razer Synapse 4 macros, including XML macro files
Razer Synapse 4 lets you create, edit, import, and assign macros to supported Razer devices. A macro is a recorded sequence of actions, such as mouse clicks, key presses, delays, commands, or file launches, triggered by pressing or holding a selected button.
You can create a macro manually, record it inside Synapse, or import a ready-made macro preset as an .xml file.
How to Create a Macro in Razer Synapse 4
Open Razer Synapse 4 and make sure it detects your Razer device. Also, check that the Macro module is installed and available in Synapse.
If you do not see the Macro section, open Modules in Synapse and install the Macro module first. Once your device is detected and the Macro module is ready, you can start creating your macro.
To create a macro:
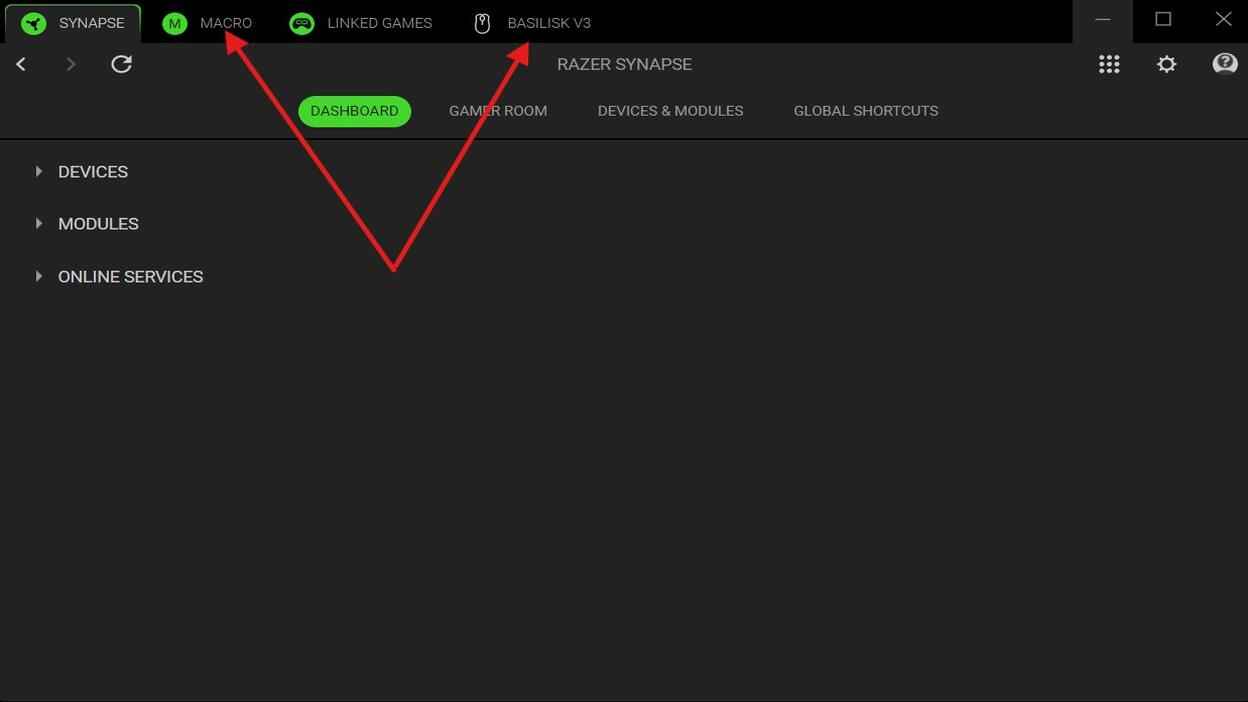
- In the Razer Synapse 4 go to the Macro tab.
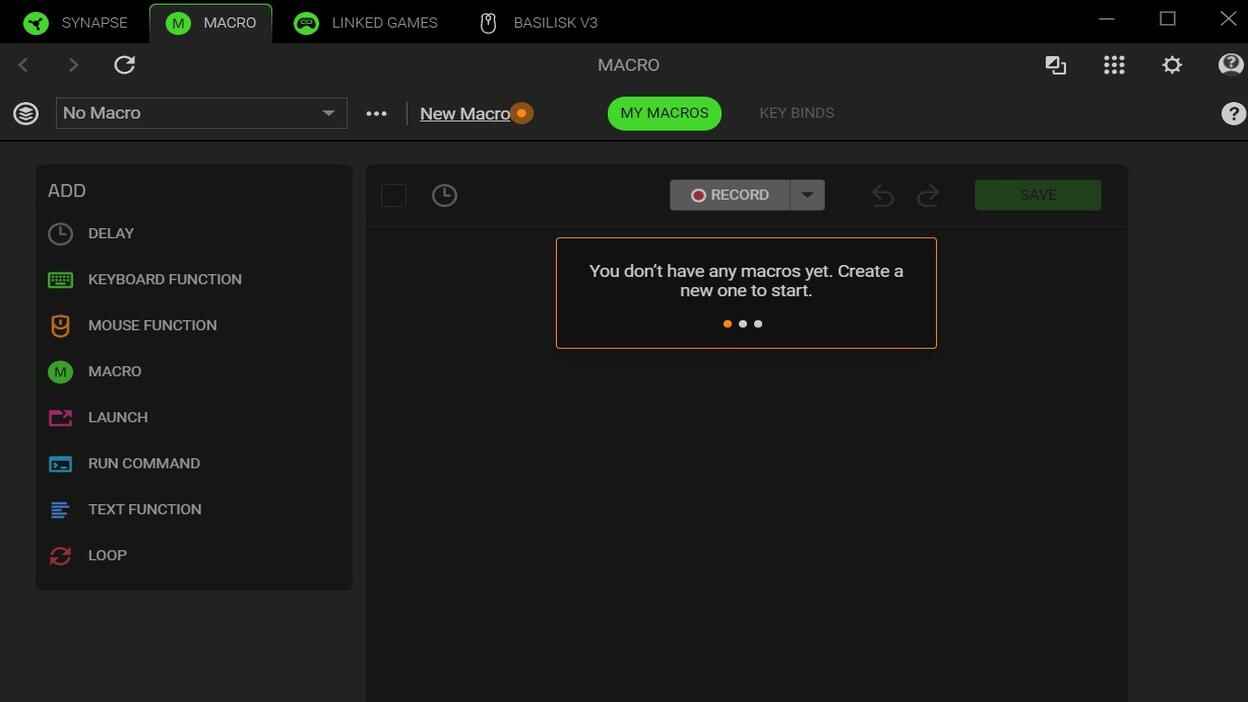
When no macros are available, click New Macro to create the first one - Click Record to start recording mouse clicks and/or keyboard inputs.
- Click Stop when the action sequence is complete.
-
Use the macro editor to change, remove, or adjust recorded actions and delays.

Use the Macro tab to record actions, add functions, edit delays, and save the macro - Use the right-side panel to add extra actions if needed.
- Click Save to save the macro.
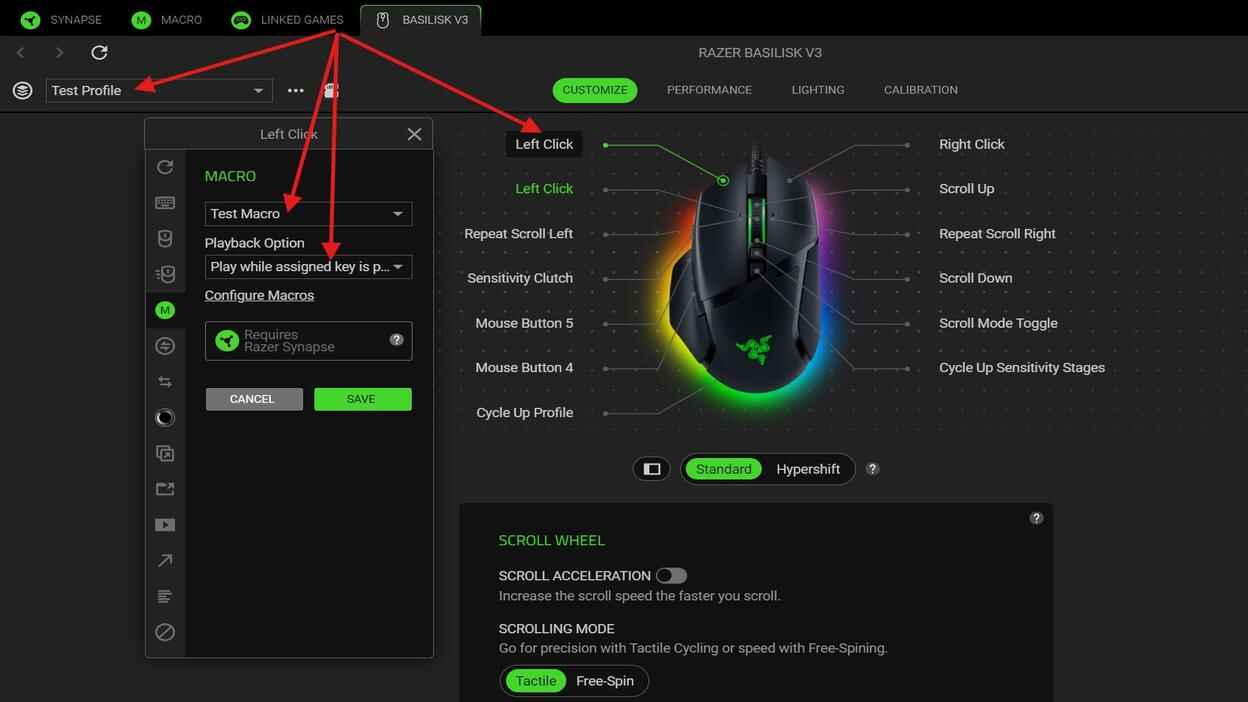
How to Assign a Macro to a Button
After creating a macro, you need to assign it to a device button.
- Go to the Device tab.
- Click the button you want to configure, such as Mouse 3, Mouse 4, or another supported button.
- In the right-side menu, select Macro.
- Choose the macro you want to assign.
-
Select the playback option and click Save
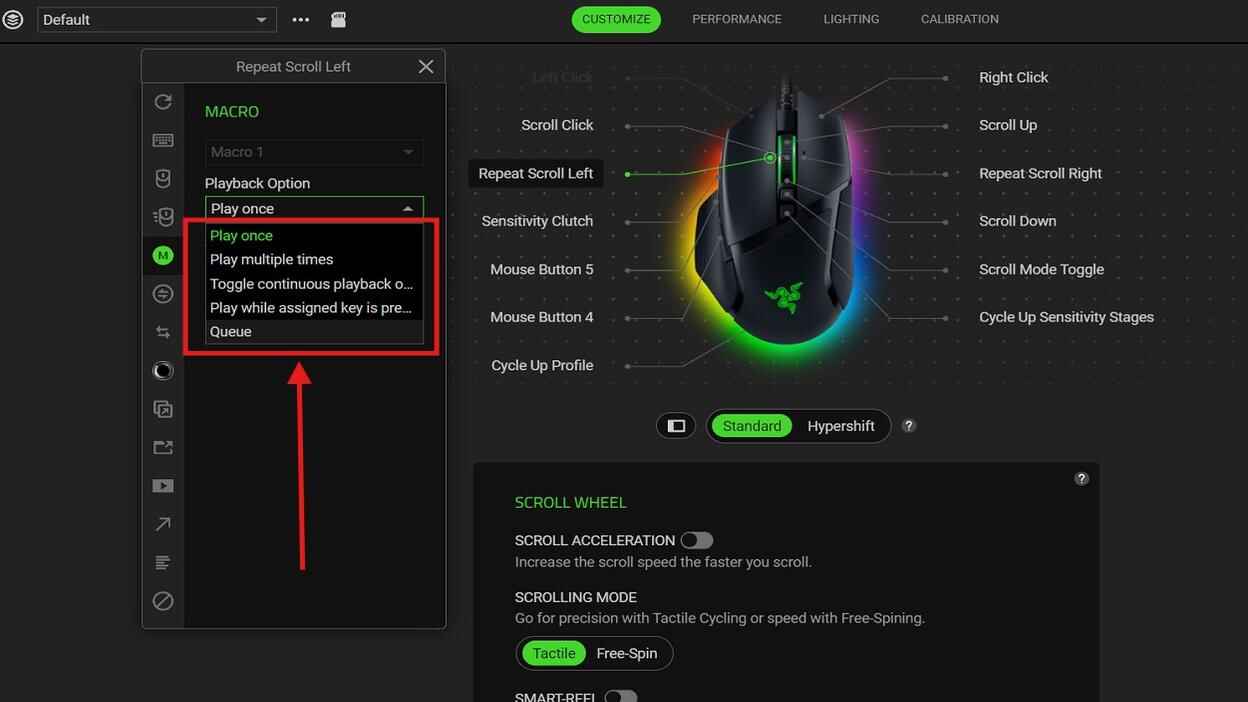
Playback options define how the macro runs after it is assigned to a button Razer Synapse 4 supports several macro playback options:
- Play Once - the macro runs one time after you press the assigned button.
- Play Multiple Times - the macro repeats a selected number of times.
- Toggle Continuous Playback On/Off Using Assigned Key - one press starts the macro, and the next press stops it.
- Play While Assigned Key Is Pressed - the macro runs only while the assigned button is held.
- Queue - Synapse 4 can queue macro actions, allowing several actions or macros to run in order. This is useful for longer sequences with delays, clicks, and chained inputs.

The macro is now assigned to the selected mouse button or keyboard key.
Profiles in Razer Synapse 4
Profiles in Razer Synapse 4 are separate sets of button assignments, performance settings, lighting settings, and macro binds.
You can create different profiles for desktop use, PUBG, Rust, CS2, Apex Legends, or any other game or program. This is useful because you do not have to change your default profile every time. Instead, you can keep a clean default setup and create separate profiles for specific games or macro presets.
Profiles can be switched manually at any time, either on the desktop or while playing.
How to Import and Assign an XML Macro File in Razer Synapse 4
You cannot assign an .xml macro file directly to a button. The file must be imported into Synapse first. After that, the imported macro can be assigned like any other macro.
Since many macro files are made for main mouse buttons such as Left Click or Right Click, it is better to create a new profile before importing and assigning them. This keeps your default profile clean and makes it easier to switch between different macro setups.
To import an .xml macro file:
- Open Razer Synapse 4 and go to your Device tab.
-
Click the three-dot icon near the profile list and choose Add to create a new profile.
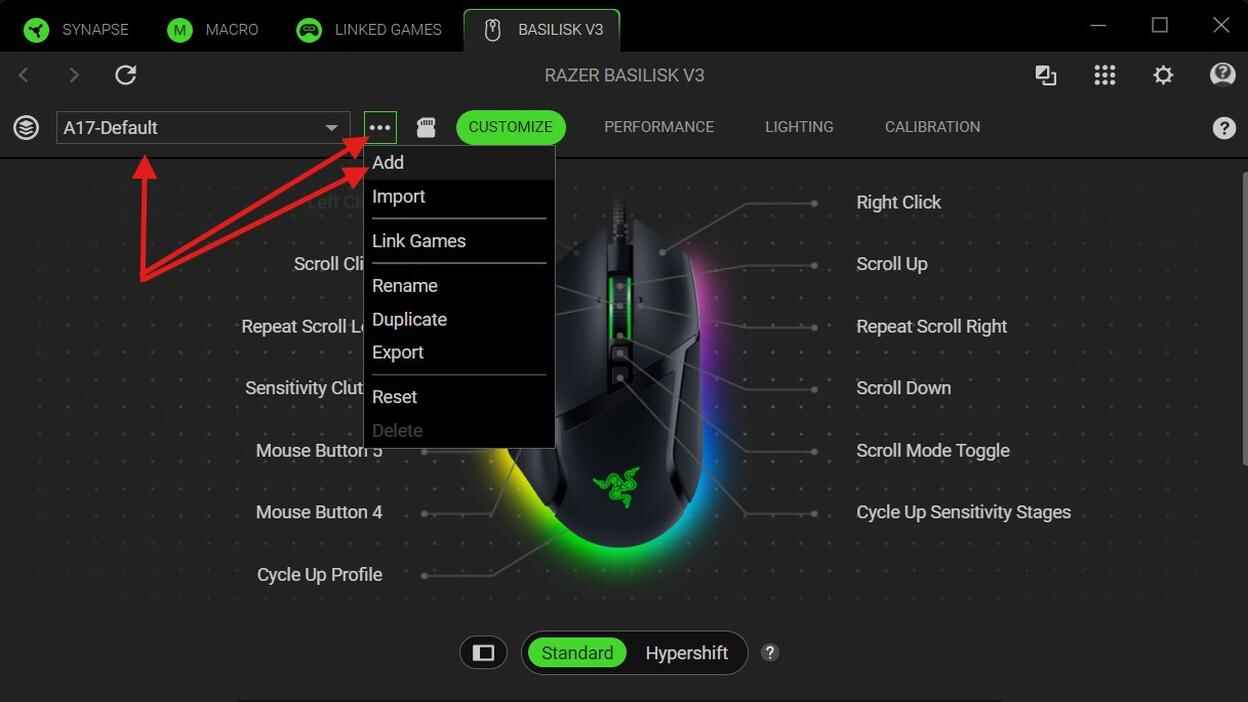
Open the profile menu and choose Add to create a new device profile - Click the three-dot icon again and choose Rename.
- Rename the profile with a relevant name, such as Apex Profile, CS2 Profile, or CS2 AK47, or another name, then press Enter.
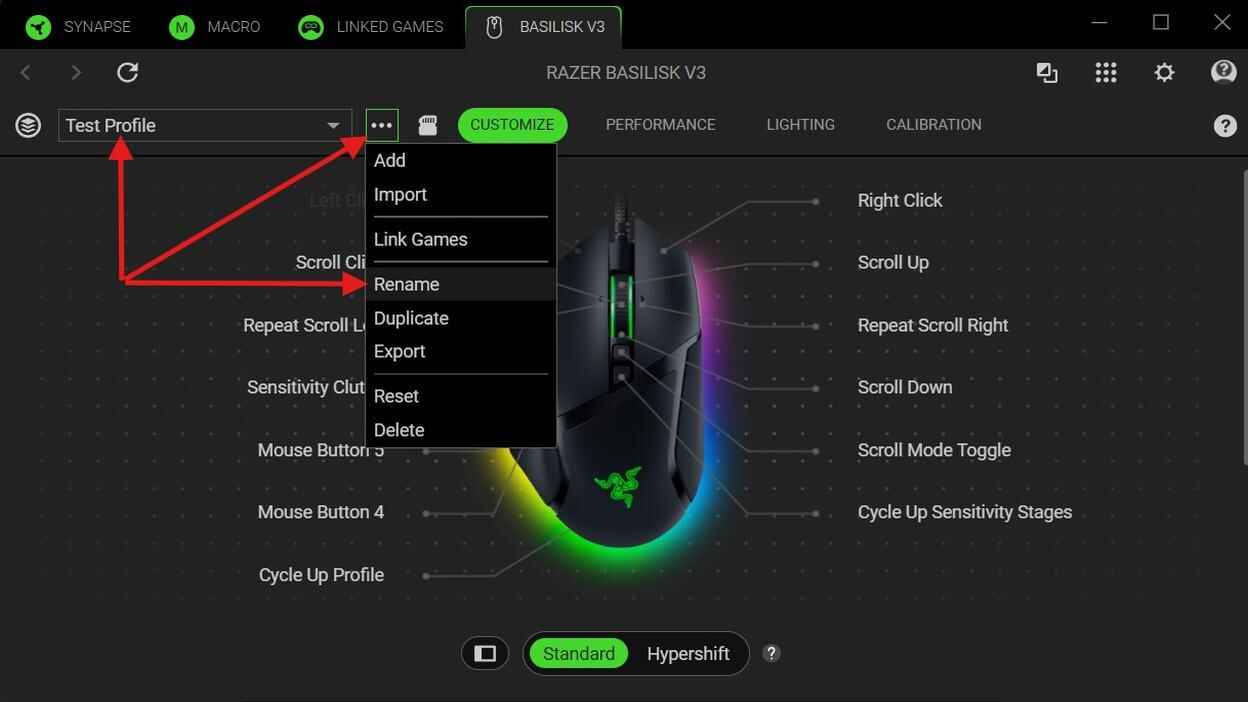
Open the profile menu and choose Rename to change the profile name - Click the three-dot icon again and choose Import.
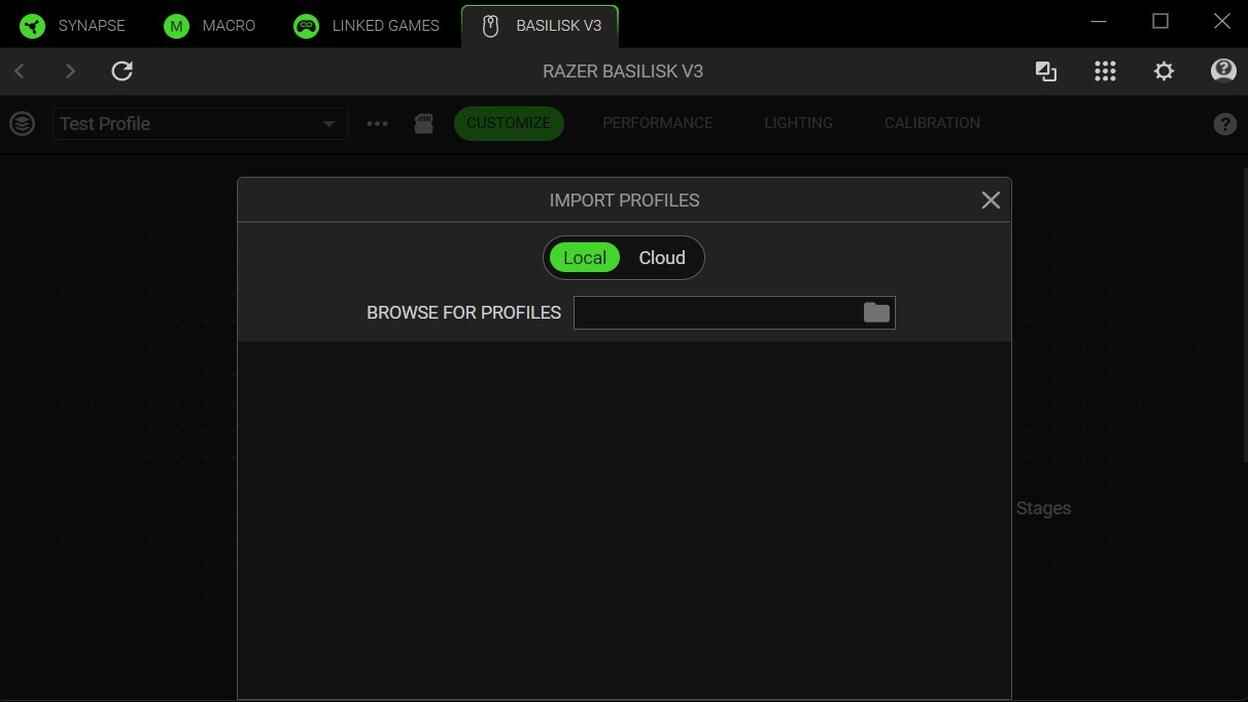
Use the Import option to browse for a local profile or macro file - Select the .xml file and import it.
After import, the macro will appear in your macro list.
To assign it: Device - Button - Macro - Imported XML Macro - Save
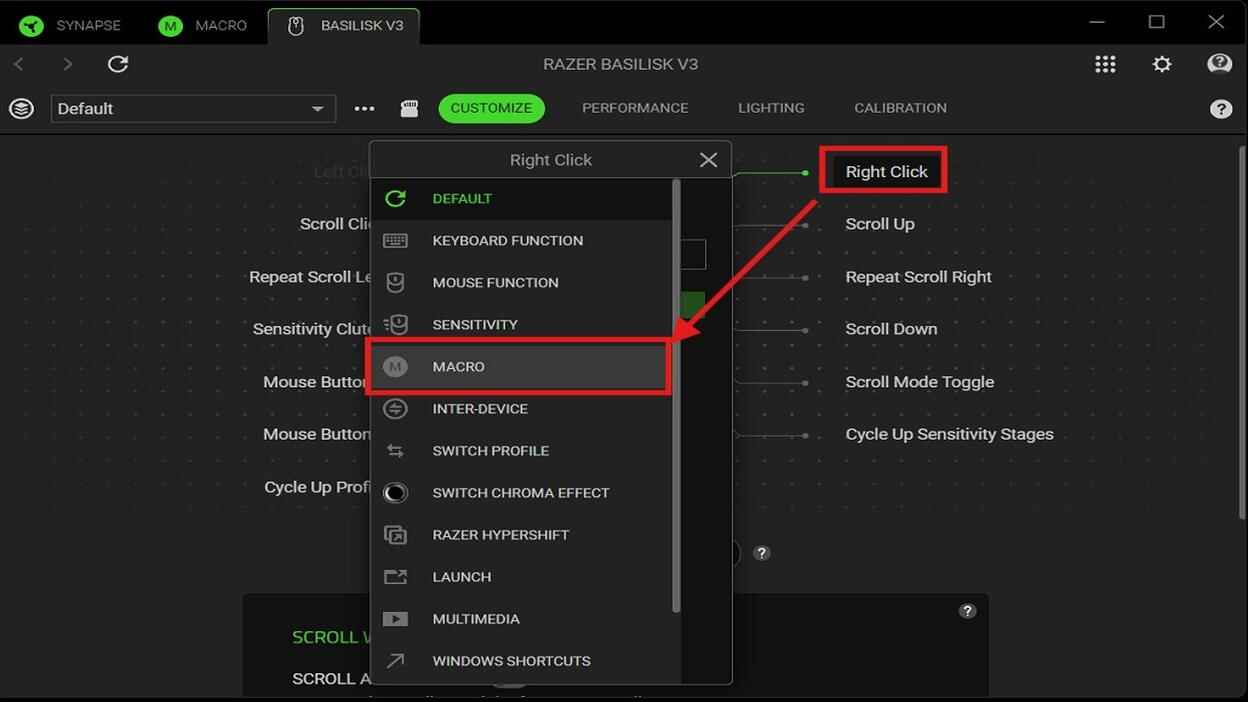
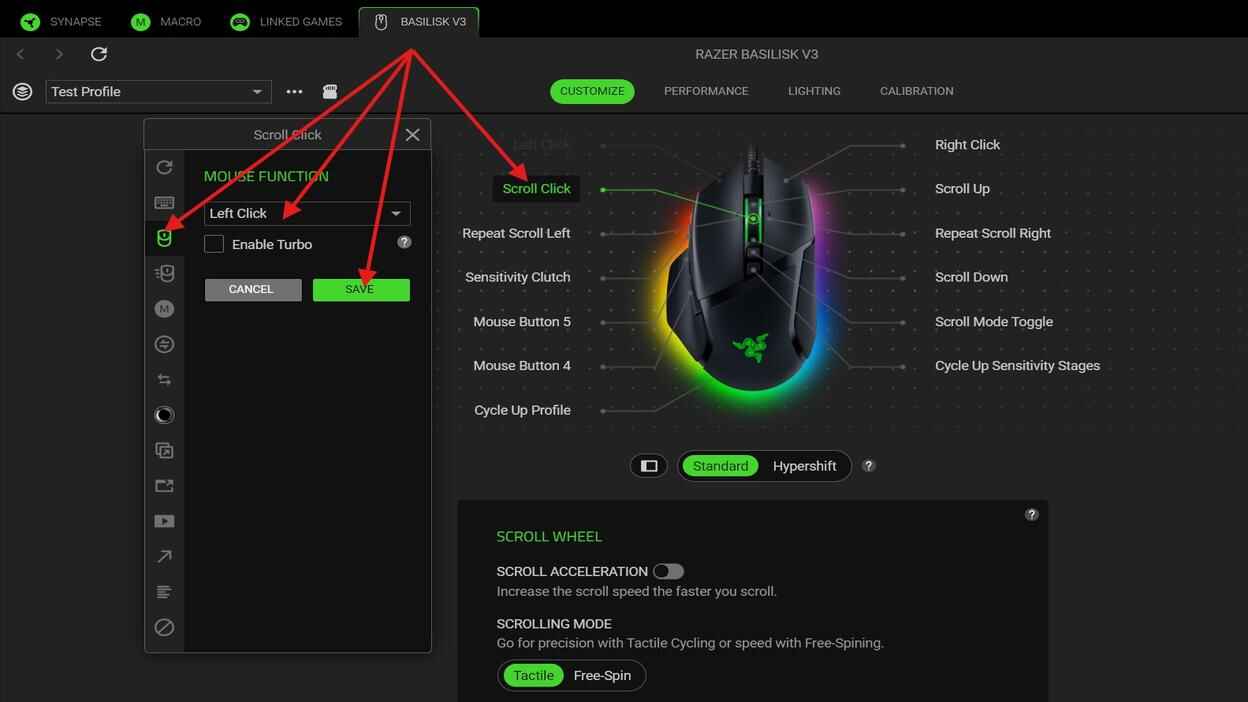
How to Bind a Macro to Left Click
By default, Left Click is locked in Synapse because the primary click function must always stay available. To edit the Left Click button, you need to move the normal left-click function to another button first.
- Open Razer Synapse 4 and go to your Device tab.
- Pick a button, such as Scroll Click, Right Click, or another available mouse button.
- In the right-side menu, open Mouse Function.
- Select Left Click and Save.
After that, the original Left Click button becomes available for macro assignment, while the button you reassigned will now act as Left Click.
Common Razer Synapse Macro Problems
Check these points:
- Razer Synapse 4 is not running.
- The wrong device profile is active.
- The macro is assigned to the wrong button.
- The assignment was not saved.
Check the playback option. Play Once, Play Multiple Times, Toggle, and Play While Pressed all behave differently.
Edit the delay values in the macro editor. Even small delay changes can affect how the macro feels.
Check the Synapse version. Macro files made for Synapse 3 will not work in Synapse 4.
Razer Synapse 4 Macro FAQ
Do Razer Synapse 4 macros work with any Razer mouse?
No. Macro support depends on the device model and Synapse 4 compatibility.
Can I assign a macro directly from an XML file?
No. The XML file must be imported into Synapse first. After import, the macro appears in your macro list and can be assigned to a button.
Can I use different macros in different profiles?
Yes. Each Synapse profile can have its own button assignments and macro binds. This lets you keep separate macro setups for different games or tasks.
Why is Left Click locked in Synapse?
Left Click is locked because the primary click function must stay available. To assign a macro to Left Click, move the normal Left Click function to another button first.