How to Set Up Macros in Bloody Esports
Install Bloody Esports macros, add BMC files to the correct folder, assign them to mouse buttons, and manage profiles for different macro setups
Bloody Esports uses its own macro folder system. To set up a macro correctly, you need to place the .bmc file in the right folder, restart the software, assign the macro to a mouse button, and save the button profile.
This guide covers the full process step by step, including macro folders, .amc to .bmc files, button assignment, profile switching, and common setup problems.
Before You Install a Bloody Esports Macro
The Bloody Esports reads macro files from a specific parent folder on your PC. Inside that folder, you can create your own subfolders, place macro files there, and then assign those macros to mouse buttons.
Bloody Esports Macro Folder
The default macro folder is:
C:\Program Files (x86)\BloodyEsport\BloodyEsport\Data\Mouse\English\ScriptsMacros\GunLib\This folder may already contain some built-in preset folders. You can test them if you want, but they are not required for your own macro setup and can be deleted.
You can create your own folder inside it and add your macros, for example:
C:\Program Files (x86)\BloodyEsport\BloodyEsport\Data\Mouse\English\ScriptsMacros\GunLib\mymacro\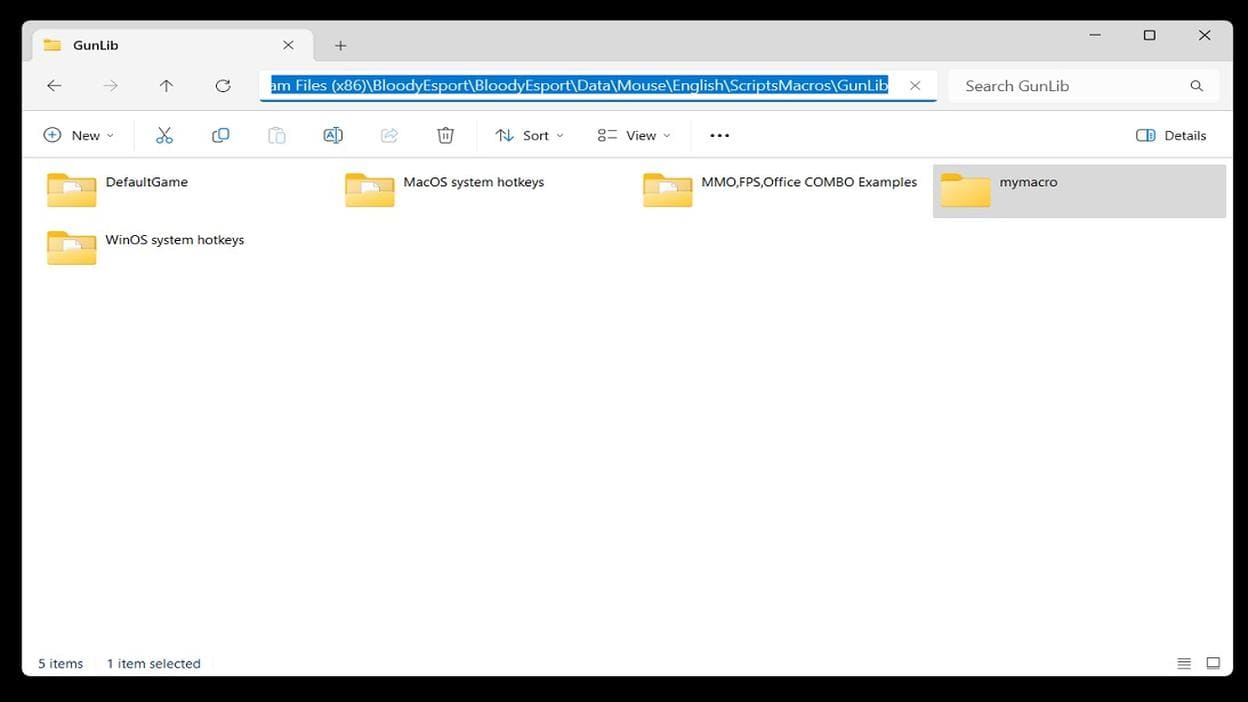
If you delete the default folder and existing preset folders, Bloody Esports may show an error after restarting and report that the last used folder is not exist.
This is not a problem. Click OK, create a new folder, add a BMC file and restart Bloody Esports. The software will generate the required config files (None.bwd and Setting.ini) and the new folder can become the default macro folder.
.bmc file inside; otherwise, the existing folder will not even appear in the Bloody Esports interface.
Bloody Macro File Types: AMC and BMC
The most common Bloody macro files usually use these extensions: .amc and .bmc. The .amc format is commonly found in older Bloody software, such as Bloody 7, Bloody WorkShop 8, and older Oscar A4Tech tools. The .bmc format is used by Bloody Esports.
Bloody Esports displays and loads macro files with the .bmc extension. Older Bloody/A4Tech tools often used .amc files, but Bloody Esports can read the same macro data after the file extension is changed.
Example: test.amc -> test.bmc
After renaming the file, place it inside your macro folder and select it from Bloody Esports like any other .bmc macro.
How to Install a Macro in Bloody Esports
Here is the short version: close Bloody Esports completely, create your own folder inside the \GunLib\ directory, place the .bmc macro file there, reopen the software, assign the macro to a mouse button, and click APPLY. The detailed steps below show each part of the process.
-
Close Bloody Esports Completely
Do not just click the X button. Close Bloody from the system tray or terminate the
BloodyEsports.exeprocess manually in Task Manager. This helps prevent the software from overwriting or ignoring the new macro files while you are adding them. -
Create Your Macro Folder and Add the Macro File
Open the parent macro directory and create your own folder inside it, for example: \mymacro\. Then place your macro file inside that folder, example: ..\GunLib\mymacro\test.bmc. If your file is
.amc, rename it to.bmc.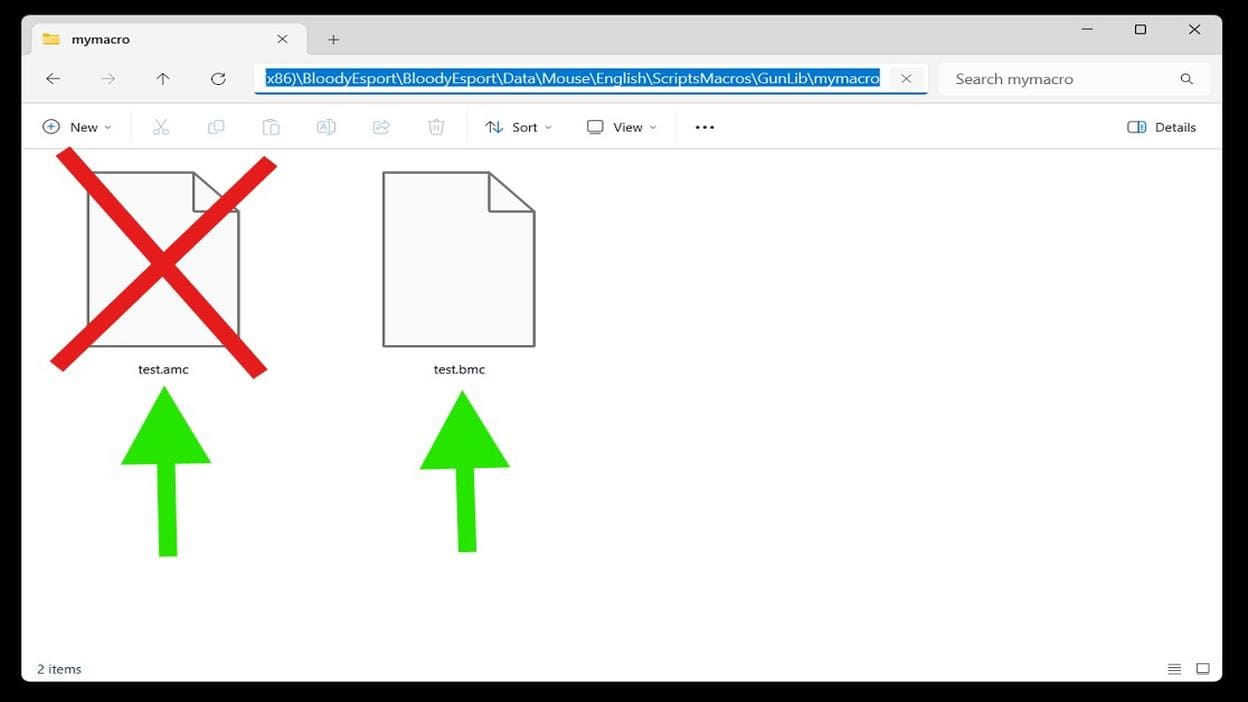
Bloody Esport needs a .bmc file inside the macro folder; an .amc file will not load -
Assign the Macro to a Mouse Button
- Open Bloody Esports and go to the BUTTON tab
- Choose the button you want to use, for example: Right Button
- Click the small arrow/checkmark on the right side of that button setting
- In the dropdown menu, select: Select Combo File > mymacro > test
Here, mymacro is your folder name, and test is your macro file name.
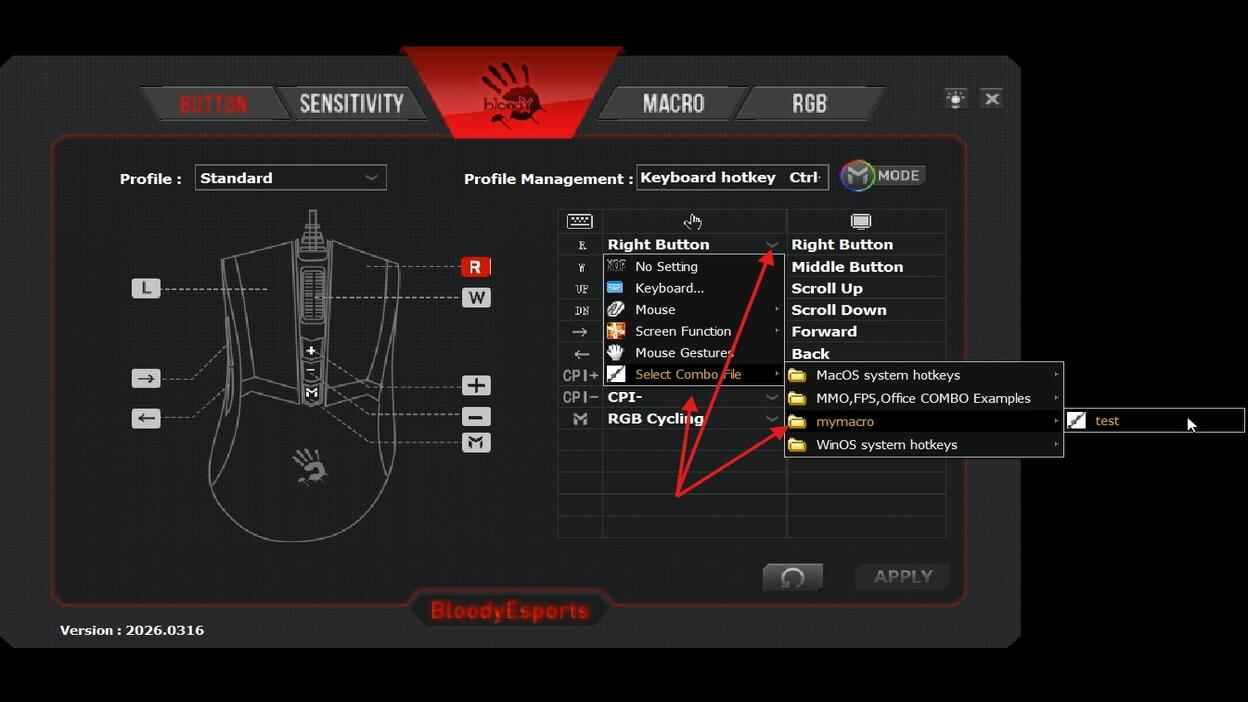
Select your custom macro folder, choose the macro file, and assign it to the desired mouse button -
Apply the Settings
Click APPLY in the lower-right corner. Bloody Esports should show a confirmation window message: [ Script Saved ]. Your macro is now assigned. Press the assigned mouse button to test how the macro behaves.
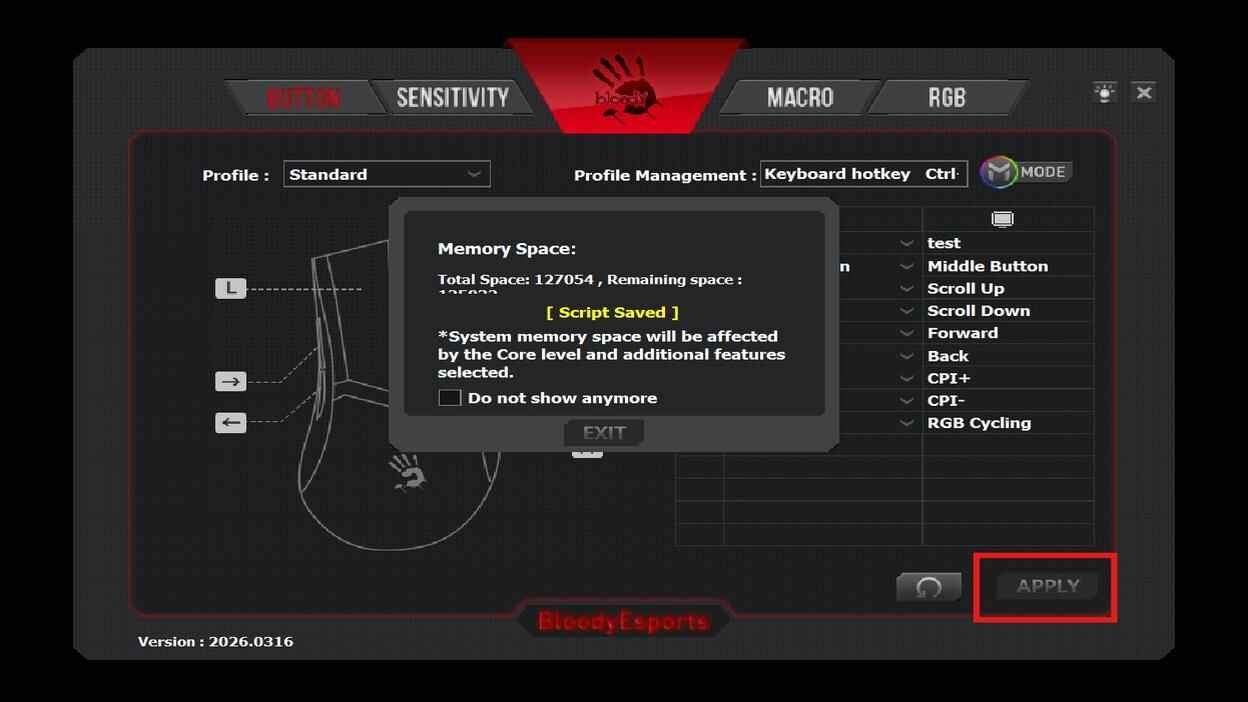
After assigning the macro, click Apply to save the new mouse button configuration
How to Reset Button Settings
If you want to reset everything back to default, click the update/reset icon to the left of APPLY, then confirm the action. This should restore the button configuration to the default state.
Bloody Esports Mouse Profiles
Bloody Esports profiles are one of the most useful parts of the software. If case of the Bloody ES9 mouse, the main profile has 9 programmable buttons out of 10. The other six profiles can use all 10 buttons. In theory, this gives up to 69 possible button assignments: 9 buttons in the main profile + 60 buttons across six extra profiles = 69 possible assignments.
To manage profiles, open the BUTTON tab and click the MODE icon in the upper-right corner. Here, you can rename profiles and change their hotkeys. This is useful if you want to bind several different weapon macros to the same mouse button. For example, you can assign six different macros to the same mouse button, one macro per profile, and switch between those profiles when needed.
Common Bloody Esports Macro Problems
Make sure the macro is assigned to the correct mouse button and that Bloody Esports is running.
Make sure the macro file is inside a folder located in the main GunLib directory. Also make sure the file uses the .bmc extension and restart the software.
Check that you clicked APPLY after assigning the macro. Bloody Esports should show the confirmation message: [ Script Saved ]. Also make sure the macro is assigned to the correct button in corect profile.
Check the macro type. No Repeat, Repeat While Holding, Toggle, and Sequence work differently.
Edit the delay values. Even small timing changes can affect how the macro feels.
Bloody Esports Macro FAQ
Do Bloody Esports macros work with any Bloody mouse?
No. Macro support depends on the mouse model and Bloody Esports compatibility. Always check that your mouse works with Bloody Esports before using a macro pack.
Can I use .amc files in Bloody Esports?
Yes. Bloody Esports loads .bmc files, but .amc macro files can be renamed to .bmc and used in Bloody Esports.
What is the difference between .amc and .bmc?
.amc is commonly found in older Bloody software, Bloody Workshop 8, and older A4Tech Oscar tools. .bmc is the format used by Bloody Esports.
Can I assign different macros to the same button?
Yes. You can assign different macros to the same mouse button in different profiles. For example, one profile can use one macro on the left mouse button, while another profile uses a different macro on the same button.
Can I reset Bloody Esports button settings?
Yes. Click the update/reset icon to the left of APPLY, then confirm the action. This should restore the button configuration to default.